Dive deep into MikroTik's RouterBoards and RouterOS. We keep you informed and up-to-date, always.
Author
Every post is penned by our certified MikroTik engineers, ensuring relevance and accuracy in every word.
Feedback
Your insights drive our content. Sharing knowledge, we elevate the MikroTik community in Canada together.
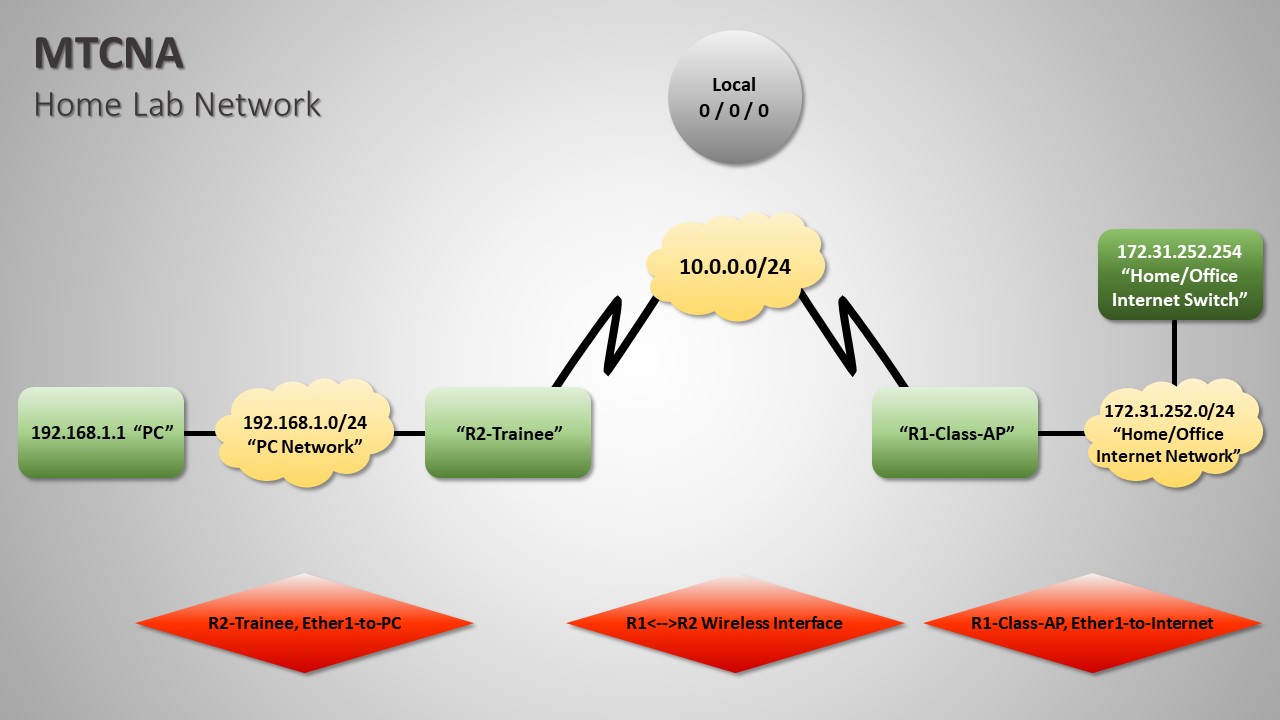
MTCNA Home Lab: Trainee Router Wireless Connection
31.08.2021
Wireless Netware Technology Ltd.
Connecting R1 & R2
In part 3 as the penultimate episode on establishing the home lab network required for our free online MTCNA course, we'll put one finishing touch on the class access point and move unto the configurations of the trainee router.
Check out the short video below for this simple instruction:
One Step Remaining
Make sure you subscribe to our YouTube channel using the above button as we will be posting the final episode in a matter of days.
As per the diagram below, this third episode completes our network up to the final remaining section, that is the "PC Network" located between the trainee's router and laptop.
Feeling Lost?
If you've stumbled upon this series of tutorials or in case you have missed our previous tutorials on the configuration of this lab network, you can easily watch the two previous episodes and catch up.
You can also drop by our free online MTCNA course page for more information about our plan for this course, including your chance for a free MTCNA exam.
Moreover, in case you don't have any MikroTik devices, we can help you purchase or rent our recommended devices for this course and its home lab.
Join the first-ever free MikroTik MTCNA training in Canada! Watch the full course online, get certified, and kickstart your networking career—100% free.
Join the first-ever free MikroTik MTCNA training in Canada! Watch the full course online, get certified, and kickstart your networking career—100% free.